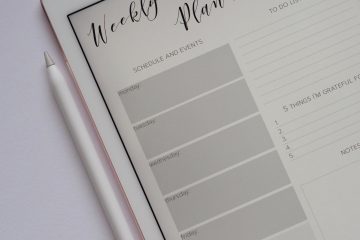
Jonathan Adjei

Jonathan Adjei

(1 comments, 56 posts)

Jon's expertise in web development is legendary and he overseas all technical aspects of our projects from development to hosting (all through the command line!)

Jon is excited by the latest techniques and keeps the company on track by finding ways to adopt new practices into our workflow.

Home page: http://fluid7.co.uk/

Posts by Jonathan Adjei
plesk_logo

Plesk passwords and all that Jazz

0


I’ve been using the mysql console tip for years from this blog post by Brian Resig (maintaining  a few legacy sites), and struggled to find it this time. In fear of losing it entirely, I’m copying it here. I’ll thank myself one day I’m sure!


mysql -u admin -p`cat /etc/psa/.psa.shadow` psa -e “SELECT accounts.id, mail.mail_name, accounts.password, domains.name FROM domains LEFT JOIN mail ON domains.id = mail.dom_id LEFT JOIN accounts ON mail.account_id = accounts.id where mail_name=’ENTER MAIL NAME HERE’ “

Wireshark network analysis tool

Ninja tools … or debugging network problems

0

Wireshark network analysis toolHaving just come through a harrowing ‘network issue’ ordeal, I thought I’d best document the steps back to sanity from out of my naivety. A rough description of the scenario follows.

We have a client using Sage Line 50 who wanted to perform queries on their web members database in conjunction with their in-house accounting information. This set me down the path of setting up an on demand connection and synch, database to database. The solution was a VPN connection between the client’s LAN and their web server.

Having never played seriously with VPNs before, we secured the help of a good colleague of ours with mad IT skillz.. Tino at Forza-IT (site coming soon).
A day on site for Tino and a few days of fiddling on my part got the solution in place. This ran fine for a couple of months, but then a rare kernel upgrade forced a reboot of the web server a week ago.

The first we heard of issues was that none of the client’s machines could access their web member’s database a few days later. Tonight’s conclusion has seen me grow from a ‘poke it and see’ position to a ‘ahhh I see how that’s working’ position. Basically I’d left a failed/partial lt2p/ipsec vpn setup in place as well as the working pptp vpn, but it took a lot of investigating to finally see the light!

The ninja tools I have acquired along the way are as follow.

Network routing and traffic investigation

netstat -rn
...
netstat -an | grep LISTEN
...
route -n
...
telnet example.com 1723
...
tshark -i eth0 proto 47
...
tshark -i eth0 port 500
...
tail -f /var/log/messages

tshark is a traffic watching tool that seems to have taken over the mantle of ethereal, tcpdump, nc (netcat) and installs on CentOS with the wireshark package. It is synonymous with tethereal.

yum install wireshark

Remote syslog harvesting

vi /etc/sysconfig/syslog

Add the -r switch to the options therein

...
#SYSLOGD_OPTIONS="-m 0"
SYSLOGD_OPTIONS="-r -m 0"
...

Ensure ‘syslog 514/udp’ is listed somewhere in /etc/services
… and finally restart syslogd

service syslog restart

Once you’ve set your router to forward event logs to the syslog server IP, /var/log/messages will harvest the router logs as well as the local events. Have a look at syslog-ng if you want to get more clever with syslog.

The combination of these tools and several hours of reading got me through in the end. The failed VPN connection had setup a network route on reboot that sent any outgoing traffic from the web server to the client router into a black hole. This made investigation really difficult, as pinging/telnet-ing the web server from the lan would send, be seen on the server, but no reply returned. I faffed with the firewall an awful lot turning lots of traffic logging on and off tracking the cause down. In the end, the thing that made the penny drop was seeing traffic over port 500 (IKE) using tshark coming from the lan when I wasn’t trying to initiate a VPN connection from the web server as far as I was aware. This was the IPSEC connection that was set to start ONBOOT, had sprung to life, failed to successfully create a VPN and killed traffic between the two sites for good measure.

Well glad that’s all over, and I’m sure the client will be on Monday … bleurgh!


Drupal CSS aggregator

0

A couple of pointers when you’re getting into theming Drupal the correct way rather than just hacking around as is most fun.

I seem to hit troubles getting the aggregator feature of Drupal working, and often end up just slapping an external CSS link call in to the page template.

The proper way to do is a little long winded, but gives us the speed optimisations offered by the aggregator facility. Instead of putting <link … /> in the page.tpl.php file, use the drupal_add_css() function in your template.php file.

The best place to put it is in a function called <themename>_preprocess_page().

And here’s an example of what that function can contain…

function mytheme_preprocess_page(&$vars) {
  //JA Inject theme styles and js
  $resetcss = drupal_get_path('theme', 'mytheme') . '/yui/build/reset-fonts-grids/reset-fonts-grids.css';
  $thickboxcss = 'misc/thickbox/thickbox.css';
  $thickboxjs = 'misc/thickbox/thickbox-compressed.js';

  drupal_add_css($resetcss, 'module', 'all', 1);
  drupal_add_css($thickboxcss, 'theme', 'all', 1);
  drupal_add_js($thickboxjs, 'theme', 'header');

  $css = drupal_add_css();
  $vars['styles'] = drupal_get_css($css);
  $vars['scripts'] = drupal_get_js();
}

Some other things to watch out for .. make sure the path you provide the aggregator is relative from root but not relative to root… I’m not helping much am I!
I mean this …
misc/thickbox/thickbox.css
as oppossed to this …
/misc/thickbox/thickbox.css

Also make sure the web server has access to the files .. correct permissions etc.
I found that even pointing the aggregator at symlinks instead of the actual files was causing a problem .. probably to do with permissions on the real files.

Anyways .. hope that helps!

References:

http://api.drupal.org/api/function/drupal_get_css/6

http://api.drupal.org/api/function/drupal_add_js/6


NVIDIA and suspend issues

0

I’ve got the nvidia proprietary video drivers running on my Fedora laptop using the rpmfusion-nonfree yum repo.

I also installed the akmod-nvidia package as it recompiles the kernel module for the graphics each time a new kernel is installed. Super!

However I’ve been battling with power suspend failing when slamming the lid on my laptop.. it hangs and won’t power off/restart without a nasty 10 sec power button press and hold.
I think I’ve finally figured the problem. It seems the kmod-nvidia- tries to install as well.

A bit of the following and all seems well in sleep world!

yum remove kmod-nvidia-

In /etc/yum.repos.d/rpmfusion-nonfree-updates.repo add this line beneath the [rpmfusion-nonfree-updates] block

exclude=kmod-nvidia-*

Plesk and Qmail into Virtualmin and Postfix

2

Biggest headache!

I’ve spent hours trying to get the Maildir storage of a Postfix install working on a Virtualmin box that had been migrated from Plesk.

There a few critical steps to get everything working. There are lots of references out there, but none covered all my issues at once. All these bits might need setting or just verifying to make it all happy, and this is done on a CentOS 5 box.
Ultra critical points for me were step 1 (6th line), step 6, step 7, step 9 and the last few command line instructions (especially the 1st line).

  1. Webmin -> Webmin -> Usermin Configuration -> Usermin Module Configuration -> Read mail
    Mail storage format for Inbox = Remote IMAP server
    Sendmail mail file location = /var/spool/mail
    Qmail or MH directory location = Subdirectory under home directory
    Qmail or MH directory in home directory = Maildir
    POP3 or IMAP server name = localhost (this might need to be typed explicitly)
    Sendmail command = /usr/lib/sendmail
    Default hostname for From: address = From real hostname
    Allow editing of From: address = yes
    From: address mapping file = /etc/postfix/virtual
    Address mapping file format = Address to username(virtusertable)
  2. Webmin -> Webmin Configuration -> Webmin Modules
    Install Postfix
    Remove Sendmail
  3. Webmin -> Servers -> Postix Mail Server -> General Options
    What domain to use in outbound mail = Use hostname
    What domains to receive mail for = $myhostname, localhost.$mydomain, localhost, localhost.localdomain
    Send outgoing mail via host = Deliver directly
    Default database type = hash
    Internet hostname of this mail system = Default (provided by system)
    Local internet domain name = Default (provided by system)
    Local networks = Default (all attached networks)
  4. Webmin -> Servers -> Postix Mail Server -> Mail Aliases
    Alias databases used by the local delivery agent = hash:/etc/aliases
    Alias databases built by “newaliases” command = hash:/etc/aliases
  5. Webmin -> Servers -> Postfix Mail Server -> Virtual Domains
    Domain mapping lookup tables = hash:/etc/postfix/virtual
    Domains to perform virtual mapping for = From domain mapping tables
  6. Webmin -> Servers -> Postfix Mail Server -> Local Delivery
    Home-relative pathname of user mailbox file = Maildir/
  7. Webmin -> Servers -> Procmail Mail Filter
    Set variable DEFAULT to $HOME/Maildir/
    Set variable ORGMAIL to $HOME/Maildir/
  8. Webmin -> Networking -> Networking Configuration -> Hostname and DNS Client
    Hostname = localhost.localdomain
  9. Webmin -> Networking -> Networking Configuration -> Host Addresses
    127.0.0.1 = localhost, localhost.localdomain
    <your external IP address> = <FQDN> (eg. 80.70.60.50 = example.com)
    Then click ‘Apply Configuration’

The last few steps are best done from the root command line…

hostname  (eg. hostname mail.example.com)
mkdir -p /etc/skel/Maildir/new mkdir -p /etc/skel/Maildir/cur mkdir -p /etc/skel/Maildir/tmp
wget -c http://www.qmail.org/convert-and-create
chmod +x convert-and-create
./convert-and-create
postmap /etc/postfix/virtual
newaliases
service postfix restart

Few extra pointers ..
you need

host `hostname`

to give you the <hostname.FQDN> and external IP address (take note of the backticks, not apostrophes)…

mail.example.com has address 80.70.60.50

and looking inside /etc/hosts, you should see the 2nd line as your external IP address and just the <FQDN>…

127.0.0.0.1   localhost   localhost.localdomain
80.70.60.50   example.com

You’re looking for the results of

postconf -n

to look something like this

alias_database = hash:/etc/aliases
alias_maps = hash:/etc/aliases
broken_sasl_auth_clients = yes
command_directory = /usr/sbin
config_directory = /etc/postfix
daemon_directory = /usr/libexec/postfix
debug_peer_level = 2
home_mailbox = Maildir/
html_directory = no
inet_interfaces = all
mail_owner = postfix
mailbox_command = /usr/bin/procmail-wrapper -o -a $DOMAIN -d $LOGNAME
mailq_path = /usr/bin/mailq.postfix
manpage_directory = /usr/share/man
mydestination = $myhostname, localhost.$mydomain, localhost, localhost.localdomain
newaliases_path = /usr/bin/newaliases.postfix
queue_directory = /var/spool/postfix
readme_directory = /usr/share/doc/postfix-2.3.3/README_FILES
sample_directory = /usr/share/doc/postfix-2.3.3/samples
sender_bcc_maps = hash:/etc/postfix/bcc
sendmail_path = /usr/sbin/sendmail.postfix
setgid_group = postdrop
smtpd_recipient_restrictions = permit_mynetworks permit_sasl_authenticated reject_unauth_destination
smtpd_sasl_auth_enable = yes
smtpd_sasl_security_options = noanonymous
unknown_local_recipient_reject_code = 550
virtual_alias_maps = hash:/etc/postfix/virtual

Anyway, hope that helps .. you can wake up and leave now if you like.

References:
http://bliki.rimuhosting.com/space/knowledgebase/linux/mail/Postfix+mbox+to+Maildir+conversion

http://bliki.rimuhosting.com/space/knowledgebase/linux/mail/postfix+notes

http://www.postfix.org/DEBUG_README.html

http://www.seaglass.com/postfix/faq.html

http://www.virtualmin.com/node/11123


Is the PCI scan on your webmin revealing weak SSL ciphers?

0

webmin

Mine was, but the fix was pretty straight forward.

  1. In Webmin go to Webmin -> Webmin Configuration -> SSL Encryption
  2. Enter the following into the Allowed SSL Ciphers field
    ALL:!ADH:!LOW:!SSLv2:!EXP:+HIGH:+MEDIUM

    I grabbed this string from the hardened Apache SSL config provided by the excellent Atomic Secured Linux.
  3. Restart webmin and you should be good to go.
  4. You can test you were successful by following the instructions in the blog post referenced below.

References:
Disable SSLv2 in Webmin | Noodles’ Blog.

Addendum:

After a bit more use/testing of these changes, it turns out this interfered with Eclipse/Trac/Mylyn when connecting to this server/repo.

I’ve just figured out to get this 100% happy, I needed to force the SSL version to 3 rather than 2 to make them happy… and of course PCI compliance tests still pass.

SSL weak cipher fixes


Grub got hosed .. that’s a bad thing

0

For some reason on upgrading my kernel on a Fedora 11 install just now, I found on reboot that my grub install was no longer working.
I think possibly the offending laptop went into standby instead of a proper reboot (not my fault of course!)

Anyways a bit of research and use of a linux boot disk and I was able to restore grub.

  1. I had to boot from the Fedora 11 install DVD I originally installed with.
  2. I then went into rescue mode rather than going through with an install
  3. I asked the rescue mode to search for my local Fedora installs and mount them under /mnt/sysimage
  4. Using fdisk and blkid /dev/sdaX I figured out which was my boot partition .. sda5 in this case
  5. I then mounted proc and dev and boot under /mnt/sysimage
  6. Then I changed root into /mnt/sysimage
  7. I ran grub, pointed it at the boot partition from my hard drive (the find part didn’t work for me, might for you, but I carried on regardless)
  8. and ran setup to correct the broken grub boot stages

After a reboot, everything was hunky dory ( except I needed to update my proprietory graphics drivers still for the new kernel but that’s not the point )


# mount -t proc none /mnt/sysimage/proc
# mount -o bind /dev /mnt/sysimage/dev
# mount -t ext3 /dev/sd5 /mnt/sysimage/boot
# chroot /mnt/root /bin/bash
# grub
grub> find /boot/grub/stage1
grub> root (hd0,4)
grub> setup (hd0)
grub> quit
# exit
# exit

My boot partition was on sda5, but in grub speak that is hd0,4 as it counts from zero. hd0 just represents the boot drive and should be used verbatim.

And now for some light relief as grub is maintained by GNU and GNU need lots of attention and Stephen Fry is probably a better face for GNU than that weird horned thing…

Stephen Fry talks free software

Stephen Fry talks free software

Check out this highly informative video

References:
http://ubuntuforums.org/showthread.php?t=224351
http://stallman.org/fry/


Scoo B Doo

0

Web Jetty are proud to announce we now host the web services for Scoo-B-Doo.org.uk, a UK charity benefiting the Special Baby Care Unit (SCBU) at Gloucestershire Royal NHS Trust.

Scoo B Doo neonatal care

Scoo B Doo neonatal care

They provide a vital role in fundraising for the purchase of the latest technologies needed to care for the most vulnerable among us. Please take a look at their site and if you’re able, get involved!

http://scoo-b-doo.org.uk/

Thanks

New wordpress same old theme

0

I’ve just upgraded my wordpress install, and am very impressed. Really slick! ..and best of all it works with an iPhone app from which this post (of no use to anyone) has come :)

Sheesh it’s warm out!

Fetching mail with fetchmail

0

During a domain transfer, while DNS was still propogating I needed to retrieve mail from the old server to the new.

I did so thusly…
# yum install fetchmail

$ touch .fetchmailrc
$ chmod 600 .fetchmailc

I then added the following lines to .fetchmailrc

poll with proto POP3
user there with password "" is "" here

Then once ensuring you can POP3 out of the server (port 110) through the firewall, you can just run ‘fetchmail’ from the command line to grab the mail.

Topping it off with a cronjob for the duration of DNS propogation would probably be a sensible finish.

References:

http://theos.in/news/howto-configure-fetchmail-linux-or-unix-client-program-to-fetch-emails/

http://www.catb.org/~esr/fetchmail/fetchmail-FAQ.html

Jonathan Adjei's RSS Feed
Go to Top